

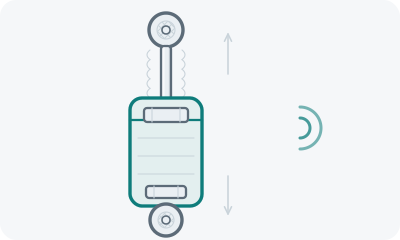
The bounce test is the best-known way of checking dampers without a lift or instruments: press on a corner of the body, let go and count the movements. It works, with caveats — it reliably catches only a badly worn damper, while one that is half tired often passes. Below is how to do it properly, how to read the result, what the bounce test cannot show, and when a rig is needed.
What the bounce test actually checks
A damper is a device that absorbs movement. The weight of the car is held by the springs, and the damper only slows their oscillation, converting the energy into heat. By rocking a corner of the body, you manually start the very oscillation that every bump creates on the road, and watch how quickly it dies away.
Hence the main limitation: the test is almost binary. It distinguishes “there is damping” from “there is practically none”, but does not measure the states in between. A hand-driven bounce is a slow rod movement of small amplitude, and a partly worn damper handles it easily even though at speed it can no longer keep up with the suspension. So a negative result does not mean the dampers are fine — but a positive result almost always means a problem.
The test does have a legitimate niche: inspecting a car before buying it, a quick check after hitting a pothole, finding the side a new noise came from. For those jobs it honestly earns its five minutes.
Step by step
- Park on level ground, switch the engine off, apply the handbrake.
- Stand at one corner and press on the body above the wheel — on the wing near the strut or on the structural part of the corner. Use your body weight, not your arms: modern bodies are tall and stiff, and hand pressure is often not enough.
- Make two or three energetic pushes in time with the body’s own rhythm — that builds amplitude, like a swing.
- At the bottom of a movement, let go sharply and count how many times the body moves before it stops.
- Repeat on all four corners and always compare the left and right sides of each axle.
Common mistakes
- Pushing on plastic. Bumpers and spoilers are not built for it: you can break the mountings and will not move the body.
- Pushing out of rhythm. Random shoves do not build the oscillation, the amplitude stays small, and the test looks “passed” whatever the dampers are like.
- Testing in the cold after a long stand. Thickened oil damps better than warm suspension does; drive a few kilometres first.
- Judging by one corner. Without comparing sides it is easy to take a characteristic of the suspension for a fault, or the reverse.
Reading the result
| How the body behaves after you let go | Conclusion |
|---|---|
| Rises, overshoots slightly, stops | Damping is normal |
| One and a half to two movements | Borderline: watch it, check the other signs |
| Two to three or more movements, the car rocks like a boat | Worn damper, replacement needed |
| One side damps noticeably worse than the other | One-sided wear or a leak — get it diagnosed |
| Knocking, creaking or clatter during the bounce | Look beyond the damper: top mounts, bushes, anti-roll bar links |
Knocking during the bounce is a separate clue. Its source is often not the damper itself but its top mount or the anti-roll bar links — short rods that are among the first things to wear out on rough roads.
What else to check while you are at the wheel
The bounce takes five minutes — spend another five on an inspection, it greatly increases the value of the test:
- Oil runs on the damper body. A light film around the rod is acceptable; a wet body with a beard of stuck-on dirt is a leak, and that damper will not last long.
- The gaiter and bump stop. A torn gaiter opens the rod to grit and the seal wears rapidly.
- The tyre tread. Patchy, wavy wear around the circumference is the classic trace of a wheel that was bouncing instead of holding the road.
- Behaviour on the move. Nose dive under braking, wallowing after a gentle undulation, bottoming out in potholes and knocking over bumps are indirect signs that the bounce test may not confirm.
When you need a rig or a mechanic
Partial degradation cannot be caught at home — that is what a damper tester exists for: the plate under the wheel vibrates at changing frequencies while sensors measure how consistently the wheel is pressed against it. The result is given as a percentage per wheel, and that is how half-tired dampers are found. The second workable option is a test drive with a mechanic on a route they know, with undulations and rough sections.
Damper manufacturers, BILSTEIN and KYB among them, recommend checking the suspension regularly, roughly every 20,000 kilometres: the wear is so smooth that the driver adapts to it and never notices how much the body roll and stopping distance have grown. On rough roads it makes more sense to follow symptoms than mileage: changed behaviour over undulations, bottoming out, knocking in the suspension.
How the repair is decided
Dampers are replaced in pairs across an axle, and wheel alignment afterwards is a required step rather than an option, because replacing struts changes the geometry.
Two more items belong in the estimate. The top mounts and bump stops: they are only reachable with the strut dismantled, they wear along with the damper, and doing them later means paying for the same disassembly twice. And whether the replacements match the original specification — mixing a stiff aftermarket damper on one axle with the original on the other produces a car that behaves differently front and rear.
If the bounce test gave an ambiguous answer and there is a noise in the suspension that is hard to describe, record it in the Pro-Stuk app while driving. The app matches the recording with your answers and shows the likely causes with an urgency level.
